Creating a campaign
A campaign is the container that holds your target audience, outreach sequence, and settings. Before Kai can research or write anything, a campaign needs to exist. This guide walks through creating one from scratch.
Before you start
You need two things in place before creating a campaign:
- A sequence in your outreach platform built and ready, with at least one email step. Kai pulls its structure from your outreach platform, so the sequence must exist first. See Personalization tokens for how that works.
- Your platform campaign ID. You find this in your outreach platform under campaign settings. In Lemlist it looks like
cam_XxxxxxxxxxxxxxxxxQDk.
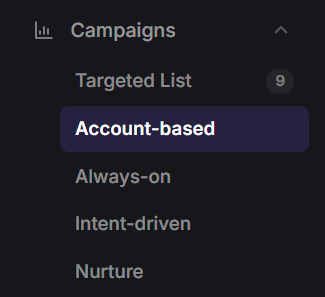
Campaign types
Kai has five campaign types. Choose the one that matches your outreach motion before you create anything. The type cannot be changed after creation.
Creating a Targeted List campaign
Targeted List is the right starting point for most teams. Here is the full creation flow.
In the left navigation, click Campaigns to expand it, then click Targeted List. If no campaigns exist yet, you will see an empty state with a button to create the first one.
This opens the campaign creation form. Give the campaign a name that tells you what it covers. The vertical, list source, or campaign window works well. For example: Media and Publishing Q3 2026.
Select the vertical this campaign targets. This tells Kai which industry context to use when writing outreach. Kai uses vertical-specific proof points, terminology, and angles, so getting this right matters for copy quality.
Paste the ID of the campaign in your outreach platform this outreach will run through. The ID lives in your outreach platform under your campaign settings and starts with cam_. This is what Kai uses to push approved contacts into the right sequence.
After saving, open the campaign settings panel and click Pull latest steps. Kai reads your sequence in your outreach platform structure and maps a token to every step. The current sequence appears below the button, and the injection token panel shows exactly what to paste into each platform sequence step.
{{kai_linkedin_note}}{{kai_email1_subject}}{{kai_email1_body}}What happens next
With the campaign created and steps pulled, the next task is placing the tokens in your sequence in your outreach platform steps, then uploading contacts and running the pipeline. Kai will research each contact, write a personalised sequence, and queue everything for your review in Approvals before anything reaches a real inbox.
Account-based, Always-on, and Intent-driven campaigns
Account-based
You enter the target company's name and website, and Kai enriches the account automatically using Firecrawl and your outreach platform's company data. After enrichment, Kai surfaces contacts it found in the right roles for you to approve or reject before anything is written.
Always-on
Instead of a contact list, you provide an ICP brief describing the companies and roles you want Kai to find. Kai sources new contacts on a four-hour cycle and queues them for approval. A saturation gate prevents the queue from getting ahead of your review capacity. You can pause, resume, or trigger an immediate source run from the campaign view.
Intent-driven
Instead of a contact source, you point the campaign at a HubSpot list. On the creation form, choose whether the list is a Contacts list or a Companies list using the toggle, paste the list ID or its HubSpot URL, and click Preview to confirm Kai can read it and see how many records it holds. You can also name the intent properties Kai should treat as signals, the HubSpot fields carrying the visit data, trigger event, or segment, so research leads with them.
There is no CSV step. Once the campaign exists, open it and Kai shows an account browser built from the live list: accounts as expandable rows with their intent signals and contact counts. Search for an account, expand it, tick the specific people you want, and click Pull selected into campaign. Those contacts drop into the normal pending-research flow. When your RevOps team enriches an account in HubSpot (adding colleagues through Clay, for example), click Refresh from HubSpot to re-pull the list. See Instructions & briefs for how the intent signal feeds Kai's research.